
Articles

Preparing Retail Floors for the First Snowfall
As the first snow begins to fall, retail stores face a familiar challenge: wet, muddy, and slippery floors. With every customer who walks through the door, snow, salt, and debris are tracked in, quickly dulling your floors and increasing slip risks. This not only impacts the appearance of your space but also the safety and comfort of customers and staff.

Powering Cleaner Operations: The Tomahawk eTOS30 Battery Push Sweeper
In the utility and energy sector, efficiency and safety are everything. From substations and service yards to power plants and administrative buildings, debris and dust can slow operations, create hazards, and affect equipment performance. The Tomahawk Battery Push Sweeper is designed to help utilities maintain safe, organized, and professional facilities—without added costs or disruptions.
Win More Contracts with Battery Push Sweepers for Spotless Floors
In the janitorial and contract cleaning industry, your reputation depends on one thing: delivering spotless results, every time. From office complexes and schools to retail spaces and warehouses, clients expect clean floors that look professional and meet safety standards. The Tomahawk Battery Push Sweeper helps cleaning crews work faster, safer, and smarter—so you can exceed client expectations and win more business.
Cleaner Properties, Happier Tenants: Why Cleanliness Matters for Property Managers
For apartment communities, first impressions are everything. Clean walkways, spotless entrances, and well-maintained common areas show residents you care—and help attract new tenants. On the other hand, debris, dust, and litter can quickly hurt property value and tenant satisfaction.
Keep Your Community Looking Its Best with a Battery Push Sweeper
For HOAs, maintaining curb appeal and safe common spaces is a top priority. Whether it’s tree leaves blowing into walkways, litter around the clubhouse, or dust in community parking lots, a clean environment makes residents feel proud of their neighborhood. The Tomahawk eTOS30 Battery Push Sweeper is the perfect solution for HOAs that want to keep their communities tidy, safe, and welcoming—without breaking the budget.
A Smarter Way to Keep Auto & Hardware Floors Clean
Auto shops and hardware stores deal with some of the toughest messes—dust, dirt, metal shavings, packaging debris, and constant foot traffic. Left unchecked, these hazards don’t just make your space look unprofessional—they can damage tools, create slip risks, and lower customer confidence. The Tomahawk eTOS30 Battery Push Sweeper is built to handle these challenges, keeping your floors clear, safe, and professional-looking.
Keep Your Store Sparkling with a Battery Push Sweeper
In retail, first impressions matter. Customers notice when a store is spotless—and they notice even more when it’s not. Dusty floors, litter in aisles, or debris at entrances don’t just hurt sales, they damage a store’s reputation. That’s why retailers are upgrading to the Tomahawk eTOS30 Battery Push Sweeper, the efficient and quiet way to keep spaces clean during and after business hours.
Keep Your Facility Looking Clean with Battery Push Sweepers
Clean Floors = Fewer Delays
In logistics and storage, time is money. Debris on the floor—whether it’s pallet chips, shrink wrap, or spilled product—slows down forklifts, creates trip hazards, and puts shipments at risk. Keeping your warehouse clear is more than maintenance—it’s a direct investment in uptime and safety.
The Tomahawk eTOS30 Battery Push Sweeper is engineered to help facilities reduce cleaning time, protect workers, and keep operations running at full speed.
Streamline Your Maintenance Operations with the Battery Push Sweepers
In logistics and warehouse operations, every second counts. Dust, pallet chips, shrink wrap, and loose debris don’t just slow down workflows—they create hazards that risk injuries, damaged goods, and costly downtime. Clean, safe floors are the foundation of efficient operations, and the Tomahawk eTOS30 Battery Push Sweeper helps facilities achieve exactly that.
A Cleaner, Safer Shopping Experience
Whether you’re shopping for fresh produce, grabbing pantry staples, or visiting us at a busy weekend market, you can trust that our facilities are clean, welcoming, and maintained with your safety in mind.
Because here, it’s not just about food—it’s about giving you the best possible experience every time you visit.
A Cleaner Market Experience with the Tomahawk eTOS30 Battery Push Sweeper
Clean Floors Build Customer Trust
In food markets and grocery environments, cleanliness is everything. Shoppers expect spotless aisles, fresh displays, and safe walkways free from spills and debris. For managers of supermarkets, farmers’ markets, and food distribution centers, keeping these spaces clean is critical for customer satisfaction, safety, and compliance with health standards.
That’s where the Tomahawk eTOS30 Battery Push Sweeper steps in—providing a fast, quiet, and eco-friendly way to keep floors clear and welcoming.
Keep Your Barns, Shops, and Yards Cleaner with the Tomahawk eTOS30 Battery Push Sweeper
On the farm, every minute counts. Dust, feed, grain, and debris build up quickly in barns, workshops, and storage areas—slowing work, creating safety hazards, and putting equipment at risk. That’s why farmers and ranchers need equipment that’s tough, efficient, and easy to use.
Power Through Cleaning: The Tomahawk eTOS30 for Gyms & Sports Arenas
In gyms and sports arenas, performance doesn’t just happen on the field or court—it starts with a safe, clean environment. Dust on a basketball court can lead to slips, litter in seating areas leaves a poor impression, and debris in weight rooms can increase risks for athletes. For facility managers, the solution needs to be fast, efficient, and built to handle daily demands. That’s why the Tomahawk eTOS30 Battery Push Sweeper is the ultimate cleaning tool for gyms and sports arenas.
A Cleaner, Safer Experience for Every Visitor: The Tomahawk eTOS30 Battery Push Sweeper
Whether it’s a community center, sports complex, or fitness facility, the first thing guests notice isn’t the equipment or the programs—it’s the cleanliness. Dust, dirt, and litter not only create an unprofessional look, but also increase slip hazards and impact air quality for athletes and families. That’s why facility managers are turning to the Tomahawk eTOS30 Battery Push Sweeper for fast, reliable cleaning.
The Tomahawk eTOS30: A Smarter Way to Sweep the Jobsite
On any paving or construction project, debris is inevitable. From asphalt dust to loose gravel, a messy site can slow production, compromise surface prep, and create costly safety hazards. For contractors, keeping a jobsite clean isn’t just good practice—it’s critical to delivering professional results.
Keep Your Jobsite Clean and Productive with the Tomahawk eTOS30 Battery Push Sweeper
On construction and asphalt jobsites, dust, gravel, and debris aren’t just an eyesore—they’re a safety hazard and a drag on productivity. Uncontrolled debris can damage equipment, increase slip and trip risks, and slow down crews. A cleaner site means smoother operations, better safety compliance, and a professional finish your customers notice.
A Smarter Way to Keep Your Facility Clean
In manufacturing and industrial environments, clean floors = safer, more efficient operations. Dust, debris, and packaging scraps don’t just look bad—they create slip hazards, damage equipment, and slow production.
Streamline Your Facility Maintenance with the Tomahawk eTOS30 Battery Push Sweeper
In industrial and manufacturing environments, cleanliness isn’t just about appearance—it’s about safety, efficiency, and compliance. Dust, debris, and spills can slow production, increase maintenance costs, and even create hazards for employees. That’s where the Tomahawk eTOS30 Battery Push Sweeper comes in—a powerful, cordless cleaning solution designed to help facilities stay efficient, safe, and inspection-ready.
Professional Cleaning Solution for Municipalities & Government Facilities
Cleaner Streets, Smarter Cities: The Tomahawk eTOS30 Battery Push Sweeper
Across cities and counties, keeping public spaces clean isn’t just about appearance—it’s about public health, safety, and pride in the community. For municipalities and government facilities, efficiency and sustainability matter. That’s why the Tomahawk eTOS30 Battery Push Sweeper is designed to deliver professional-grade cleaning performance while meeting modern sustainability goals.
Lift Smarter, Not Harder: The Power of an Electric Paver Slab Vacuum Lifter
Stop breaking your back on heavy pavers. With an Electric Paver Slab Vacuum Lifter, you’ll work smarter, finish faster, and deliver cleaner results. Whether it’s tile, stone, or concrete, Tomahawk’s vacuum lifter is the upgrade every hardscaping pro needs in their toolkit.
Smash Through Tile Like a Pro: The Power of a Demo Hammer
If you’ve ever tried removing tile flooring with a hand chisel, you know how back-breaking and time-consuming it can be. Tile is designed to last—and that means it takes real muscle to break it free. That’s where the Demo Hammer comes in. Built for heavy demolition, this tool makes tearing out tile floors faster, cleaner, and easier than ever before.
Supercharge Your Hardscape Projects: Meet the Tomahawk TVL440 Vacuum Lifter
When you're laying large-format pavers or heavy flagstone, traditional lifting methods slow you down—and put your crew at risk. Enter the Tomahawk TVL440: a game-changing, battery-efficient solution that promises speed, safety, and precision.
Built for the Toughest Jobs: The Industrial Power of Fan-Cooled Vests
Fan-cooled vests are industrial cooling solutions made for people who work hard in the toughest environments. Built rugged. Built reliable. Built to keep you going when the heat tries to slow you down.
Conscious Cooling: Gear That Works Smarter for You—and the World
Conscious gear means making choices that are better for you and the world around you. Fan-cooled vests let you beat the heat, reduce your energy use, and protect your health—all in one simple, portable solution. It’s cooling with a conscience.
Cooling for Every Body: How Fan-Cooled Vests Are Redefining Outdoor Gear
Cooling gear shouldn’t be one-size-fits-some. Fan-cooled vests bring high-performance technology to bodies of all shapes, sizes, and styles—proving that comfort and capability belong to everyone.
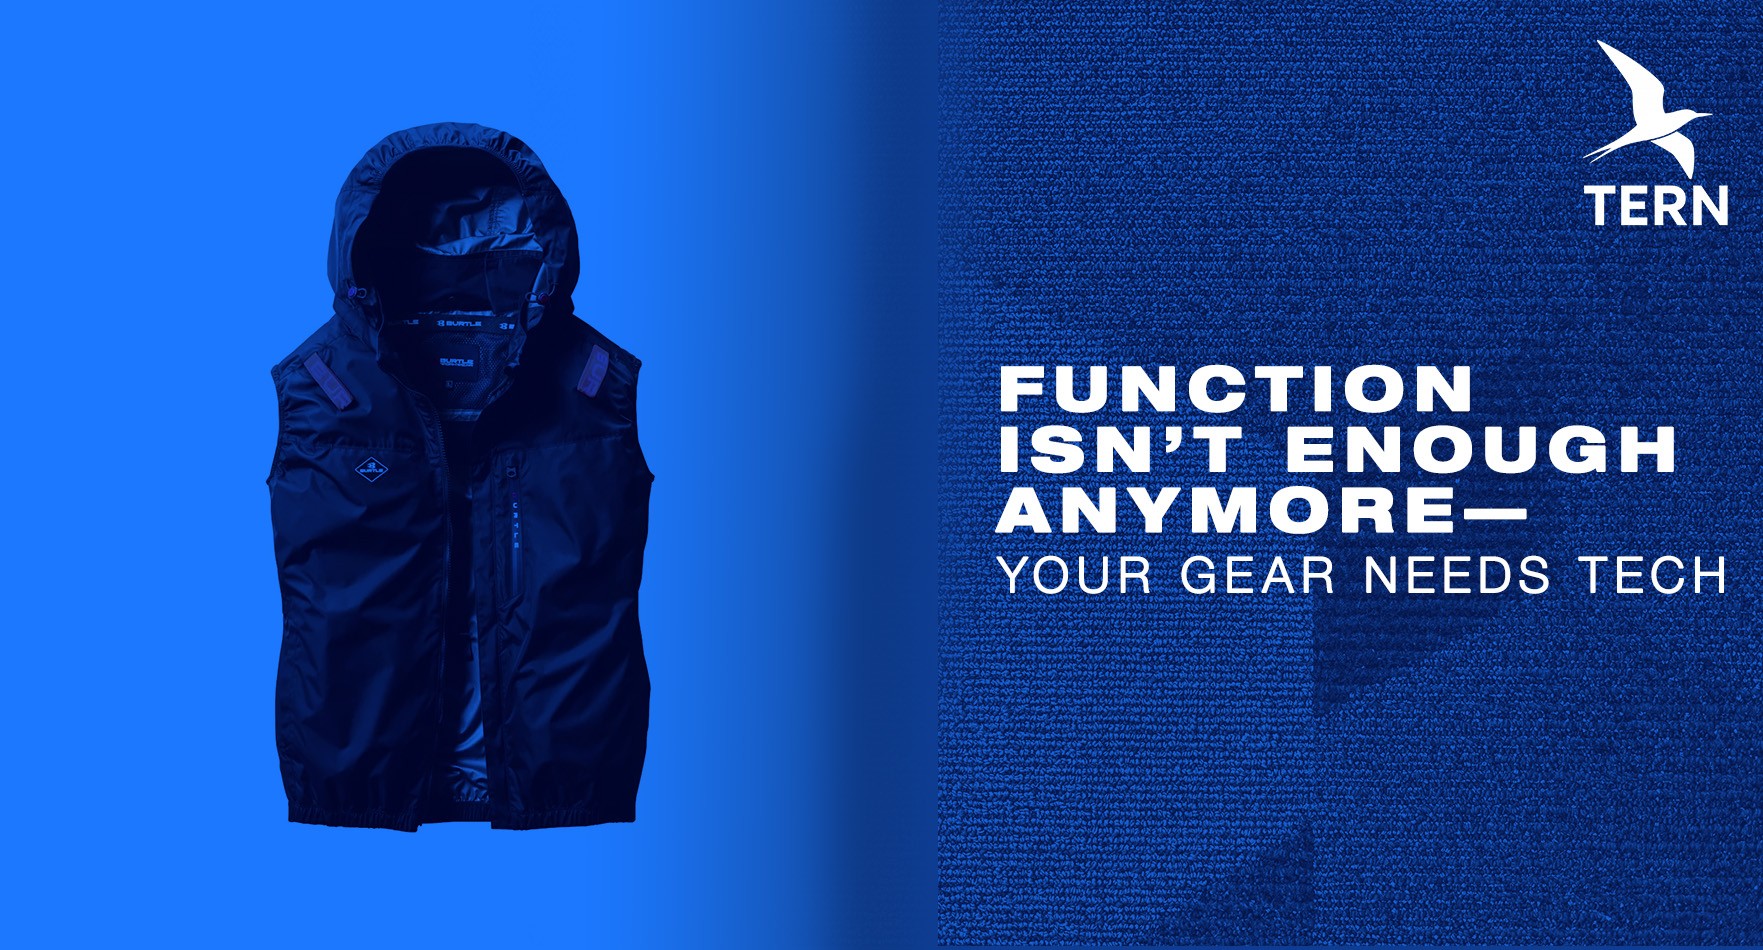
Function Isn’t Enough Anymore—Your Gear Needs Tech
Gear that works is good. Gear that works with you is better. Fan-cooled vests take function to the next level by putting technology at the heart of your workwear. The future of staying cool, safe, and productive is already here—and you can wear it.
Heat Isn’t Just Uncomfortable—It’s a Hazard
Heat isn’t just something you “deal with”—it’s a hazard you defend against. Fan-cooled vests are more than gear—they’re personal safety equipment designed for the modern, hotter-than-ever world. Stay safe. Stay cool.
From Jobsite to Everyday: How Workwear Became a Lifestyle
Workwear has always been about blending toughness with utility. Fan-cooled vests take that tradition into the modern era—bringing jobsite grit to everyday life, and proving that the best gear is the gear you can wear anywhere.
The Future of Cool: How Tech-Integrated Apparel Is Changing the Way We Dress
This isn’t just a vest—it’s tech you wear. Fan-cooled apparel is turning clothing into gear that works as hard as you do, and it’s only getting smarter from here.


