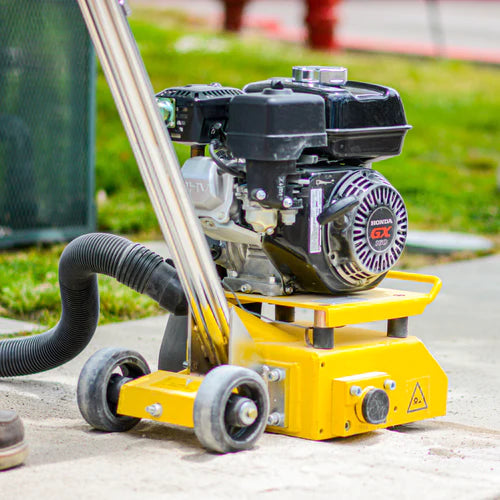
Like every other buyer, you wonder how long you can expect your machine to last. It can be frustrating not being able to operate your scarifier on the job site. To expertly troubleshoot your machine we will guide through these expert techniques to get you back to work. Before exploring our explosion diagram, learn follow these troubleshooting and maintenance tips. Operators troubleshooting machinery breakdown should follow basic steps:
-
Define the problem.
-
Identify and understand primary cause.
-
Find possible solutions.
-
Make necessary repairs.
The primary goals of operating a concrete scarifier is for floor preparation, removing trip hazards, and/or to achieve textured and rough surfaces. Concrete Scarifiers are designed to work on asphalt, concrete, and coatings. Some parts of the machine require proper maintenance and constant replacement.
Assembly
How To Attach The Handles On A Tomahawk Concrete Scarifier
Engine Will Not Start
-
Check fuel levels: If your Honda engine is out of fuel, add gasoline and/or oil
-
Note: We recommend Octane 87+ Gasoline. Replace oil regularly to ensure longevity. We recommend to add SAE10W-30.
-
Fuel valve: If the fuel valve is turned “OFF”, then turn to the “ON” position.
-
Check the engine switch: If the Honda Engine Switch is set to “OFF”, switch it to “ON”.
-
Note: Pull the recoil starter until engine starts.
-
Fix choke: If the choke is open, we recommend closing the choke.
-
Fix tilt: Tilt the 8’’ Scarifier forward, NOT back on the handle
-
Note: Oil can overflow into the cylinder, which may cause damage to the engine.
-
Throttle lever: Adjust the throttle lever to accelerate the engine.
-
Clean engine: Change the gasoline in the gas tank
-
Note: Old gasoline can clog up the carburetor, making it difficult to start the engine.
-
The spark plug misfires: Clean up the spark plug and/or replace it in case it looks worn.
- Kill Switch: Ensure it is properly installed.
Poor Performance
-
The engine speed is low: Use a tachometer and adjust or repair the engine.
-
Reduced engine performance: Air filter may clogged with dust. Clean or replace the air filter cartridge.
Cutter Drum Is Not Balanced
-
Space cutter wheels to slightly move side to side and spin freely, but not too loose. There has to be enough balance for scarifier the drum.
-
Check flail shaft: If the flail shafts are excessively worn, replace it before it affects the life of the drum. Replace shafts as soon as the grooves are 1/5 of an inch.
-
Note: Drums can be destroyed within few hours, if the fail shafts are badly worn.
Maintenance Tips
Concrete scarifiers require constant maintenance to prevent machinery breakdowns. The following parts need regular checks before and after operating the machine. Let’s take a look at quick tips to maintain essential parts of your concrete scarifier:
-
Air filter: We strongly recommend to clean the air filter daily, and replace it every 30 hours. Check for excess dust or dirt prior to operating the engine.
-
Note: Operating the engine with a dirty air filter may lead to engine failure, before the average expected lifespan of the engine.
-
Belt: There has to be proper belt tension.
New set of belts: If you replace a set of belts, these should be re-tensioned at least an hour after of use. Conversely, belts that are two tense will shorten belt and bearing life.
-
Drum: Lubricate the drum, and check if it is configured with the right cutters. Keep in mind that the drum must be balanced with the right number of blades and size of tips.
Note: Working with cutters requires extra caution when placing in the correct direction of drum rotation. The drum set up needs to be balanced, but in some instances are not always precise, when spacers might not fit.
How To Remove The Drum Cage Blades On A Concrete Scarifier
-
Cutters: The rotation of the your cutters is important to achieve proper resurfacing. Additionally, to ensure maximum wear life, the blades and drum assembly must follow a specific mounting pattern. Cutters must rotate towards the front of the scarifier.
-
Cutters should have enough space to move side to side and spin freely slightly, but not too loose. There has to be enough balance between scarifier drums.
-
In case you are using milling cutters, we suggest to not use these for aggressive milling or grinding of concrete.
-
Scarifier bearings: There are two bearings one on each side. Make sure to inspect regularly. Check for signs of cracking and if the guards are in the right place.
How To Replace The Bearings On A Concrete Scarifier
By following these troubleshooting steps, you can save yourself time and money - and get back to the job site. If you’re looking for a guide on how to operate your concrete scarifier, check out out “How to Use Concrete Scarifier” article. We recommend keeping a detailed record of replacement parts, maintenance, and inspections. Reference the our scarifier explosion diagram to better solve your maintenance needs.


