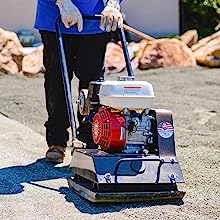
The fuel tank is a critical component of the GX160 engine, providing the necessary fuel supply to power various equipment. Over time, fuel tanks can become damaged, rusted, or develop leaks, compromising the engine's performance. If you're facing fuel tank issues, don't worry – replacing the fuel tank on a GX160 engine is a manageable task with the right tools and a little guidance. Here's a step-by-step guide to help you through the process:
VIDEO:
This is what You Will Need:
Honda GX160
New Fuel Tank
A 12mm socket and ratchet.
And Needle Nose Plyers
First, disconnect the breather tube for better access to the back of the tank.
Using a 10mm socket and ratchet - loosen the 1 back bolt and 2 front bolts securing the fuel tank in place.
Then disconnect the fuel line using needle nose pliers to release the tank from the carburetor.
If your new fuel tank did not include a new fuel joint or fuel cap, remove the fuel joint from the bottom of the old fuel tank using a 12mm socket and ratchet.
Then remove the cap from the old fuel tank.
Before installing the new fuel tank - fasten the fuel joint in place with a 12mm socket and ratchet and then connect to fuel cap.
Next reconnect the fuel line to the base of the tank using needle nose pliers.
Once connected, align the tank back on top of the engine and fasten the back bolt and 2 front bolts.
Finally, reattach the breather tube.
You have successfully replaced the carburetor on your Honda GX160 engine. Ensuring your equipment runs with a new, leak-free fuel tank will enhance engine performance and extend the life of your valuable machinery. Remember to conduct regular maintenance checks to keep your engine in top-notch condition. If you encounter any difficulties during the process, consult the manufacturer's manual or reach out to the Tomahawk Support Team to ensure proper replacement.


