
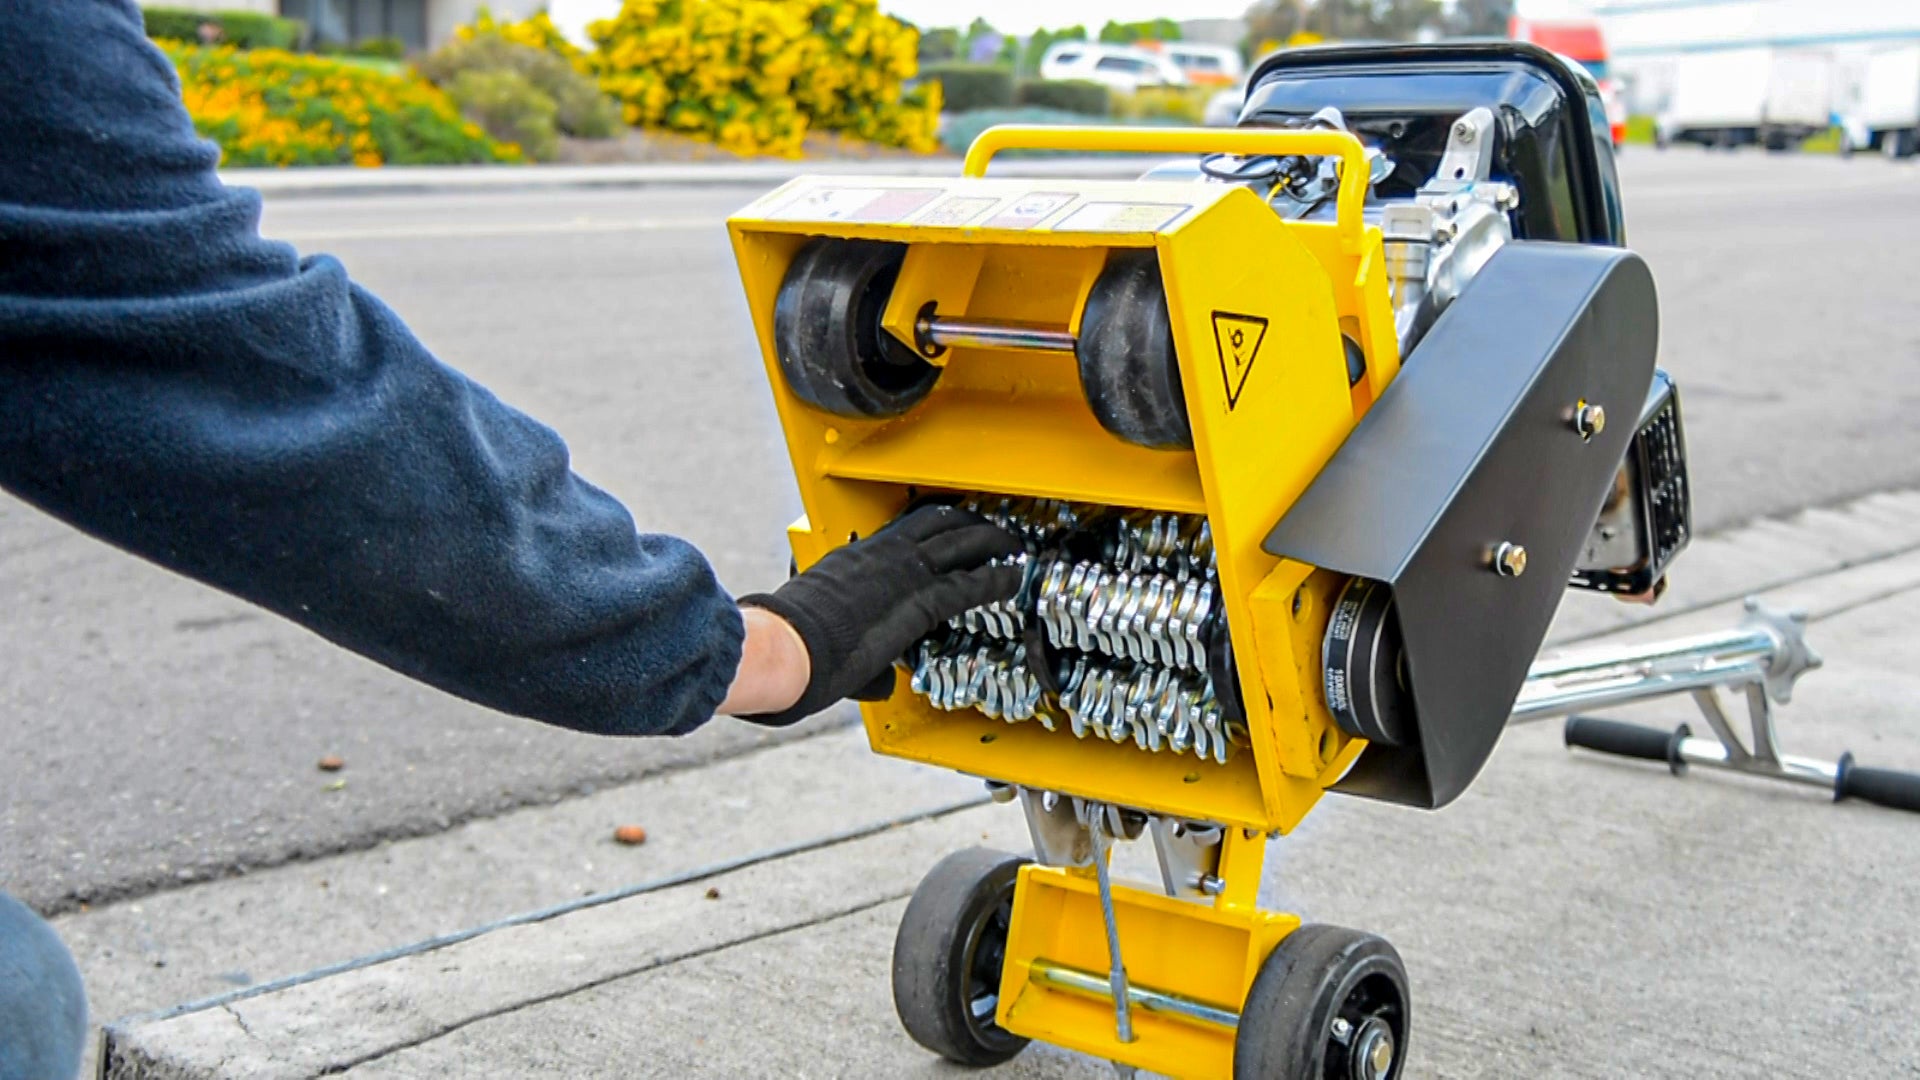
Easy to install with Tomahawk Power’s 8” Gas Concrete Scarifier, the Drum Cage Blades are great for tasks such as milling of misaligned sidewalk for trip hazard repair, floor cleaning and preparation, concrete, coating, traffic line, marking removal, and general surface preparation.
Additionally, these drums are perfect for light to medium milling of concrete, thick non-skid removal from steel, removing coal tar epoxy, marine non-skid, asphalt, and thick urethane rubber. The drum cage blade is on a shaft located inside the base of the scarifier.
Learn how to install the drum cage blade for your concrete scarifier:
What You Will Need:
- Concrete Scarifier (TSCAR-8H)
- Drum Cage Blades
- 26mm socket wrench
Instructions:
Step 1:
Pull off the shaft protective cap, located on the side of the scarifier base.
Step 2:
Use a 26mm socket wrench to loosen the shaft screw.
Step 3:
Pull the shaft out of the scarifier base.
Step 4:
Remove the drum cage blade.
Step 5:
Slide the new drum cage blade on to the shaft.
Step 6:
Slide the shaft with the new drum cage blade back into the scarifier base.
Step 7:
Tighten the shaft screw with a 26mm socket wrench.
Step 8:
Put the protective cap back on to the scarifier base to cover the shaft.
Now that you have installed the drum cage blade, your concrete scarifier is ready to use!
We hope this guide helped you get the most out of your backpack sprayer. Check back in to Tomahawk's comprehensive library of manuals, assembly guides, videos, & more to power your world!


