
Let's get your scrubber ready for its first job. Follow these simple steps to get cleaner floors, save time, and keep your machine running strong.
1. Charge and Assemble
Before using your floor scrubber for the first time, fully charge the battery. A full charge gives you the longest runtime and helps you get the most out of every cleaning session. If the brushes or squeegee were shipped separately, install them with the magnetic quick connect before use. Make sure everything is properly secured before starting the machine.
2. Sweep First
For the best results, always remove loose dirt and debris before scrubbing. While the floor scrubber is designed to clean hard floors quickly and efficiently, sweeping first helps the brushes focus on scrubbing instead of pushing around dirt, paper, rocks, and other debris. Excess debris will get stuck in the squeegee and leave streaks.

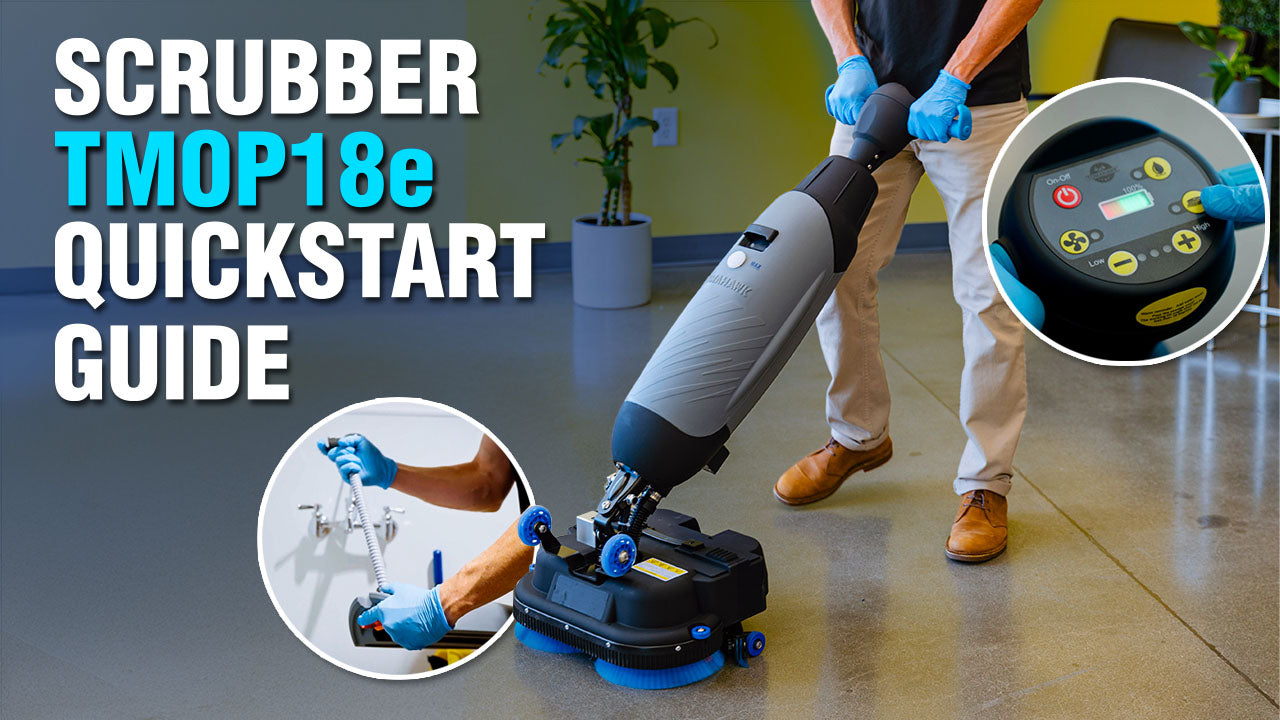
3. Fill the Clean Water Tank
Remove the retractable hose from the clean water tank and fill it with fresh water and a low-foam, neutral floor cleaner. Neutral cleaners are safe for most finished floors and provide excellent daily cleaning performance without leaving behind sticky residue. Avoid using excessive detergent. Too much soap can reduce cleaning performance and create unnecessary foam inside the recovery system.

Recommended Chemicals
- Neutral Cleaner: Daily cleaning and maintenance
- Degreaser: Garages, warehouses, and oil-stained floors
- Enzyme Cleaner: Restaurants and kitchens
- Eco-Friendly Cleaner: Plant-based cleaning solutions
Important: Never use floor stripper chemicals inside the machine.

4. Start Cleaning
Press the Power button, then activate the Vacuum, Brush, and Water functions. Once the machine is running, simply walk at a comfortable pace and allow the scrubber to do the work. There is no need to push down on the handle or force the machine forward.

For the most consistent floor finish, clean in straight lines and slightly overlap each pass, just like mowing a lawn. This helps ensure complete floor coverage and prevents missed spots.
As you clean, the dual brushes scrub away dirt while the vacuum and squeegee recover dirty water in the same pass. The result is clean, dry floors that are ready for foot traffic immediately, with no puddles or streaks left behind.

5. Shut Down Properly
When you're finished cleaning, turn off the water flow first. Allow the vacuum to continue running for several seconds. This helps remove any remaining water from the hose and recovery system.
Once the remaining water has been collected, power down the machine completely. This simple step helps keep the recovery system cleaner and ready for the next use.
6. Empty the Recovery Tank
After every cleaning session, remove the recovery tank and empty the dirty water. Take a minute to rinse the tank with clean water. This prevents buildup, odors, and residue from accumulating between cleaning jobs. Regular tank cleaning helps keep your machine looking and performing its best.

7. Clean the Filter Screen
One of the most important maintenance steps is cleaning the filter screen inside the recovery tank. Rinse the screen after every use.
A clean screen helps:
- Maintain airflow
- Improve suction performance
- Increase cleaning efficiency
- Protect the vacuum system
This quick step takes only a few seconds and can help prevent unnecessary service issues.

8. Inspect, Recharge, and Store
Before storing your scrubber, take a quick look at the brushes, squeegee, and filter screen. Remove any string, hair, paper, or debris that may have become wrapped around moving parts. Recharge the battery after every use so the machine is ready for the next cleaning job. Store the floor scrubber in a clean, dry location away from excessive moisture or extreme temperatures.
9. Choose the Right Brush or Pad
Using the correct brush or pad can make a big difference in cleaning performance.
Blue Brush
Ideal for:
- Daily cleaning
- Scuff marks
- Light stains
- Routine maintenance
This is the setup most users rely on every day.

Red Pad
Ideal for:
- Buffing
- Restoring shine
- Maintaining finished floors
White Pad
Ideal for:
- Polishing
- Finished floors
- Light touch-up work
If you're unsure which option to use, start with the blue brush. It delivers excellent results on most hard floor surfaces.
Final Thoughts
The TMOP18e floor scrubber is designed to make floor cleaning faster, easier, and more effective than traditional mopping.
Remember these simple steps:
- Sweep first
- Use the right cleaner
- Let the machine do the work
- Empty the recovery tank
- Clean the filter screen after every use
- Recharge the battery
With just a few minutes of maintenance, your floor scrubber will provide reliable performance and leave floors clean, dry, and ready for traffic every day.


